Three Days, One Unit, No Scars: A Pop-Up Graphics Kit That Comes Down Clean
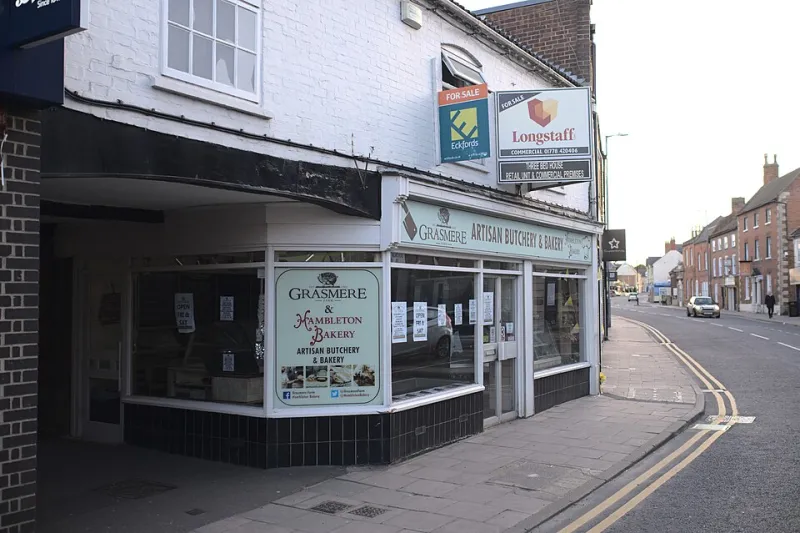
Photo: Bob Harvey , CC BY-SA 2.0, via Wikimedia Commons
A pop-up never really starts on opening day. It starts with the landlord’s schedule of condition, the venue’s fixings policy and a quiet question in the back of everyone’s mind: what will this unit look like when we hand it back? Get those answers early and the graphics brief becomes much simpler. Leave them until the week before launch and you will spend opening morning negotiating with a centre manager while a roll of low-tack vinyl sweats in the van.
The good news is that short-lease retail is now a well-worn format in the UK. Empty units, market halls, railway arches and shopping centre mid-malls all host brands that need to look established for 72 hours and then vanish. The graphics kit for that job is not a smaller version of a permanent shopfit. It is a different animal: lighter, labelled, documented and designed backwards from removal.
Start with the schedule of condition, not the mood board
Before anyone chooses a typeface, walk the unit with a phone camera and photograph every surface you might touch. Painted plaster, laminate panelling, powder-coated shutters, glazing, ceiling grids and those mysterious access panels all behave differently. Ask the landlord or venue team, in writing, what is permitted: adhesive vinyl, hanging points, weighted stands, window film, temporary partitions. If the answer is “nothing sticks”, find out whether that means no drilling, no residue or no graphics at all. Those are three very different briefs.
A useful habit is to keep a one-page fixings schedule with the kit. It should name the surface, the approved fixing, the person who approved it and the removal method. When a well-meaning area manager arrives with a roll of gaffer tape, the schedule settles the argument faster than a group chat.
Build a kit that can travel between units
Modularity is not just a sustainability line. It is what stops a three-day shop from needing a five-day install. Think in repeatable panels: lightweight rigid boards that fit through a standard doorway, fabric graphics on simple frames, freestanding units with weighted bases, and window panels sized to the glazing rather than the dream render. If a graphic cannot be carried by one person up a narrow staircase, it is probably the wrong graphic for a short-lease unit.
Label everything. Not just “wall graphic 1” but “left of door, above socket, 1200 x 800”. The person installing may not be the person who designed it, and the person removing it may be a different crew again. A simple crate plan, printed and taped inside the lid, saves an extraordinary amount of time at both ends of the booking.
Fixings that do not leave a deposit-sized hole
Drilling is usually out. Even where it is allowed, making good is a cost and a delay. The practical toolkit tends to be low-tack adhesives, removable window film, magnetic tape on metal surfaces, hook-and-loop systems where the landlord accepts them, and freestanding or weighted displays that need no wall at all. None of these are magic. Low-tack vinyl still needs a clean, dust-free surface, and it still needs to be removed slowly and at the right angle. A hair dryer is sometimes helpful; a wallpaper steamer is not.
Be wary of anything described as “leaves no residue” without a test. Ask for a small sample, stick it to an offcut or an inconspicuous corner, leave it for the duration of the event and remove it under realistic conditions. That is a far better test than a supplier’s data sheet read in a hurry.
Fire ratings: the question that arrives late
Sooner or later, a venue will ask for fire performance information. Sometimes it arrives after the graphics are printed. That is an expensive time to discover that the material has no paperwork. For UK venues, ask for the classification and the test evidence behind it, and keep copies with the kit rather than in someone’s inbox. “Fire retardant” on an invoice is not a specification. A certificate that matches the actual material, batch and application is.
This matters most with fabrics, papers and any graphic that covers a large wall area. It also applies to temporary structures and ceiling-hung elements, which often attract more scrutiny than a simple wall panel. If the unit is in a shopping centre, station or managed market, check whether the venue has its own approved materials list. It usually does.
Windows are the fastest thing to change
Window graphics do a lot of heavy lifting in a pop-up because they announce the shop before the door is open. Quick-change vinyl, static cling and perforated film all have a place, but specify them for the glass you actually have. Old, thermally stressed or coated glass can be fussy. Fire exit routes and safety signage must remain visible. And the removal plan should include the glass, not just the walls: residue on a shopfront is the first thing a landlord sees on handover.
Leave pull tabs on larger window panels. Train whoever is removing them to work slowly and to stop if the film tears. A 20-minute removal job is a bargain; a two-hour scrape is not.
The removal plan is part of the design
A three-day shop should not become a three-week cleanup. Agree a strike time before the launch, book access for it, and name the person responsible. Pack the kit back into labelled crates, separate reusable panels from waste, and use a licensed waste route for anything that cannot travel again. In the UK, commercial waste still needs a proper duty-of-care trail, even when the unit is tiny and the event is over.
Budget for making good as well. Not because you expect damage, but because a small allowance changes the conversation from “can we risk it?” to “how do we remove it properly?” The best pop-up graphics are not the ones that look most permanent. They are the ones that look convincing for exactly as long as needed, then leave the unit ready for the next idea.